 Skip to content
 Deploying and Securing an ArangoDB Cluster Using Docker
Introduction
Deploying a distributed database securely can be challenging, but Docker simplifies the process. This guide walks you through setting up a three-node ArangoDB cluster using Docker and Docker Compose. I'll also cover essential security measures, including authentication, TLS encryption, and automated backups.
Before You Begin
- Create a Folder: Create a dedicated folder on your system where you will store all the files related to this setup (e.g., arangodb-cluster).
- Open Terminal in the Folder: Open your terminal and navigate to the folder you just created. All commands in this guide should be run from this folder.
1. Setting Up the Cluster
1.1 Prerequisites
Before you begin, ensure that your system has the following installed:
- Docker — for containerized deployment.
- Docker Compose — for managing multi-container applications.
- OpenSSL — for generating TLS certificates.
1.2 Creating a Docker Network
Create a dedicated Docker network to ensure secure communication between cluster nodes:
Bash:
docker network create arangodb-net1.3 Create .env File
Create a .env file to store sensitive information such as the JWT secret key and the ArangoDB root password:
ARANGO_ROOT_PASSWORD=Password
ARANGO_JWT_SECRET=Z3uM7z+WkP1r8UxvOZkQ+v4R4dGFL9aA+dmby5Z1R5c=
1.4 Deploying the Cluster
Define the cluster in a docker-compose.yml file:
networks:
  default:
    name: arangodb-net
    external: true

services:
  agency1:
    image: arangodb/enterprise:3.12.4
    container_name: agency1
    command: >
      /bin/sh -c "arangod
      --server.endpoint tcp://0.0.0.0:8531
      --agency.activate true
      --agency.size 3
      --agency.supervision true
      --server.authentication true
      --agency.endpoint tcp://agency1:8531
      --agency.endpoint tcp://agency2:8531
      --agency.endpoint tcp://agency3:8531
      --agency.my-address=tcp://agency1:8531
      --server.jwt-secret $$ARANGO_JWT_SECRET"
    environment:
      - ARANGO_ROOT_PASSWORD=${ARANGO_ROOT_PASSWORD}
      - ARANGO_JWT_SECRET=${ARANGO_JWT_SECRET}
    networks:
      - default
    healthcheck:
      test: ["CMD", "sh", "-c", "arangosh --server.endpoint tcp://agency1:8531 --server.authentication true --server.username root --server.password $$ARANGO_ROOT_PASSWORD --javascript.execute 'db._query(\"RETURN 1\").toArray()'"]
      interval: 10s
      timeout: 10s
      retries: 10

  agency2:
    image: arangodb/enterprise:3.12.4
    container_name: agency2
    command: >
      /bin/sh -c "arangod
      --server.endpoint tcp://0.0.0.0:8531
      --agency.activate true
      --agency.size 3
      --agency.supervision true
      --server.authentication true
      --agency.endpoint tcp://agency1:8531
      --agency.endpoint tcp://agency2:8531
      --agency.endpoint tcp://agency3:8531
      --agency.my-address=tcp://agency2:8531
      --server.jwt-secret $$ARANGO_JWT_SECRET"
    environment:
      - ARANGO_ROOT_PASSWORD=${ARANGO_ROOT_PASSWORD}
      - ARANGO_JWT_SECRET=${ARANGO_JWT_SECRET}
    networks:
      - default

  agency3:
    image: arangodb/enterprise:3.12.4
    container_name: agency3
    command: >
      /bin/sh -c "arangod
      --server.endpoint tcp://0.0.0.0:8531
      --agency.activate true
      --agency.size 3
      --agency.supervision true
      --server.authentication true
      --agency.my-address=tcp://agency3:8531
      --agency.endpoint tcp://agency1:8531
      --agency.endpoint tcp://agency2:8531
      --agency.endpoint tcp://agency3:8531
      --server.jwt-secret $$ARANGO_JWT_SECRET"
    environment:
      - ARANGO_ROOT_PASSWORD=${ARANGO_ROOT_PASSWORD}
      - ARANGO_JWT_SECRET=${ARANGO_JWT_SECRET}
    networks:
      - default

  dbserver1:
    image: arangodb/enterprise:3.12.4
    container_name: dbserver1
    command: >
      /bin/sh -c "arangod
      --server.endpoint tcp://0.0.0.0:8530
      --cluster.my-address tcp://dbserver1:8530
      --cluster.my-role DBSERVER
      --server.authentication true
      --cluster.agency-endpoint tcp://agency1:8531
      --cluster.agency-endpoint tcp://agency2:8531
      --cluster.agency-endpoint tcp://agency3:8531
      --server.jwt-secret $$ARANGO_JWT_SECRET"
    environment:
      - ARANGO_ROOT_PASSWORD=${ARANGO_ROOT_PASSWORD}
      - ARANGO_JWT_SECRET=${ARANGO_JWT_SECRET}
    networks:
      - default

  dbserver2:
    image: arangodb/enterprise:3.12.4
    container_name: dbserver2
    command: >
      /bin/sh -c "arangod
      --server.endpoint tcp://0.0.0.0:8530
      --cluster.my-address tcp://dbserver2:8530
      --cluster.my-role DBSERVER
      --server.authentication true
      --cluster.agency-endpoint tcp://agency1:8531
      --cluster.agency-endpoint tcp://agency2:8531
      --cluster.agency-endpoint tcp://agency3:8531
      --server.jwt-secret $$ARANGO_JWT_SECRET"
    environment:
      - ARANGO_ROOT_PASSWORD=${ARANGO_ROOT_PASSWORD}
      - ARANGO_JWT_SECRET=${ARANGO_JWT_SECRET}
    networks:
      - default

  dbserver3:
    image: arangodb/enterprise:3.12.4
    container_name: dbserver3
    command: >
      /bin/sh -c "arangod
      --server.endpoint tcp://0.0.0.0:8530
      --cluster.my-address tcp://dbserver3:8530
      --cluster.my-role DBSERVER
      --server.authentication true
      --cluster.agency-endpoint tcp://agency1:8531
      --cluster.agency-endpoint tcp://agency2:8531
      --cluster.agency-endpoint tcp://agency3:8531
      --server.jwt-secret $$ARANGO_JWT_SECRET"
    environment:
      - ARANGO_ROOT_PASSWORD=${ARANGO_ROOT_PASSWORD}
      - ARANGO_JWT_SECRET=${ARANGO_JWT_SECRET}
    networks:
      - default

  coordinator1:
    image: arangodb/enterprise:3.12.4
    container_name: coordinator1
    command: >
      /bin/sh -c "arangod
      --server.endpoint tcp://0.0.0.0:8529
      --cluster.my-address tcp://coordinator1:8529
      --cluster.my-role COORDINATOR
      --server.authentication true
      --cluster.agency-endpoint tcp://agency1:8531
      --cluster.agency-endpoint tcp://agency2:8531
      --cluster.agency-endpoint tcp://agency3:8531
      --server.jwt-secret $$ARANGO_JWT_SECRET"
    environment:
      - ARANGO_ROOT_PASSWORD=${ARANGO_ROOT_PASSWORD}
      - ARANGO_JWT_SECRET=${ARANGO_JWT_SECRET}
    networks:
      - default
    ports:
      - "8541:8529"

  coordinator2:
    image: arangodb/enterprise:3.12.4
    container_name: coordinator2
    command: >
      /bin/sh -c "arangod
      --server.endpoint tcp://0.0.0.0:8529
      --cluster.my-address tcp://coordinator2:8529
      --cluster.my-role COORDINATOR
      --server.authentication true
      --cluster.agency-endpoint tcp://agency1:8531
      --cluster.agency-endpoint tcp://agency2:8531
      --cluster.agency-endpoint tcp://agency3:8531
      --server.jwt-secret $$ARANGO_JWT_SECRET"
    environment:
      - ARANGO_ROOT_PASSWORD=${ARANGO_ROOT_PASSWORD}
      - ARANGO_JWT_SECRET=${ARANGO_JWT_SECRET}
    networks:
      - default
    ports:
      - "8551:8529"

  coordinator3:
    image: arangodb/enterprise:3.12.4
    container_name: coordinator3
    command: >
      /bin/sh -c "arangod
      --server.endpoint tcp://0.0.0.0:8529
      --cluster.my-address tcp://coordinator3:8529
      --cluster.my-role COORDINATOR
      --server.authentication true
      --cluster.agency-endpoint tcp://agency1:8531
      --cluster.agency-endpoint tcp://agency2:8531
      --cluster.agency-endpoint tcp://agency3:8531
      --server.jwt-secret $$ARANGO_JWT_SECRET"
    environment:
      - ARANGO_ROOT_PASSWORD=${ARANGO_ROOT_PASSWORD}
      - ARANGO_JWT_SECRET=${ARANGO_JWT_SECRET}
    networks:
      - default
    ports:
      - "8561:8529"
Start the cluster with the following command:
bash
docker compose --env-file .env up -d
This command starts all containers in detached mode. You can access the ArangoDB web interface via the following URLs:
- Coordinator1: http://localhost:8541
- Coordinator2: http://localhost:8551
- Coordinator3: http://localhost:8561
2. Authentication and User Management
By default, ArangoDB allows root access. To enhance security, set a strong root password and create additional users with restricted privileges.
2.1 Creating a New User
Execute the following command to create a new user:
bash
docker exec -it coordinator1 arangosh --server.endpoint http+tcp://coordinator1:8529 \
--server.username root --server.password Password
To further secure access, create a dedicated database and user:
javascript
db._createDatabase("secureDB");
db._createUser("adminUser", "StrongPassword", { active: true });
3. Enabling TLS/SSL Encryption
Secure communication between nodes with TLS encryption.
3.1 Generate Certificates
Use OpenSSL to generate a private key, certificate signing request (CSR), and a self-signed certificate:
# Create private key in file "server.key"
openssl genpkey -out server.key -algorithm RSA -pkeyopt rsa_keygen_bits:2048 -aes-128-cbc# Create certificate signing request (CSR) in file "server.csr
openssl req -new -key server.key -out server.csr# Copy away original private key to "server.key.org"
cp server.key server.key.org# Remove passphrase from the private key
openssl rsa -in server.key.org -out server.key# Sign the CSR with the key, creating certificate PEM file "server.crt"
openssl x509 -req -days 365 -in server.csr -signkey server.key -out server.crt# Combine certificate and key into single PEM file "server.pem"
cat server.crt server.key > server.pem3.2 Mount Certificates in Containers
Modify the docker-compose.yml file to include the certificate and key files:
Yaml
coordinator1:
  volumes:
    - ./server.pem:/etc/arangodb3/keyfile.pem

coordinator2:
  volumes:
    - ./server.pem:/etc/arangodb3/keyfile.pem

coordinator3:
  volumes:
    - ./server.pem:/etc/arangodb3/keyfile.pem
3.3 Restart the Cluster
Apply the configuration by restarting the cluster:
bash
docker-compose restart4. Backup and Recovery
Regular backups ensure data safety and quick recovery in case of failures.
4.1 Automating Backups with arangodump
Perform manual backups with:
bash
docker exec coordinator1 arangodump --output-directory /backups --server.password Password
4.2 Scheduling Backups with cron
Automate daily backups at 2 AM:
bash
docker exec coordinator1 sh -c "echo '0 2 * * * arangodump --output-directory /backups --server.password Password' | crontab -"
4.3 Restoring from Backup
Restore data using:
bash
docker exec coordinator1 arangorestore --input-directory /backups
Conclusion
By following this guide, you have successfully deployed a secure, scalable ArangoDB cluster using Docker. This setup includes authentication, encrypted connections, and automated backups to ensure high availability and data protection. Your ArangoDB cluster is now production-ready!
Do Graph Databases Scale? Yes? No? Let’s see!
Estimated reading time: 10 minutes
Graph Databases are a great solution for many modern use cases: Fraud Detection, Knowledge Graphs, Asset Management, Recommendation Engines, IoT, Permission Management … you name it.
All such projects benefit from a database technology capable of analyzing highly connected data points and their relations fast – Graph databases are designed for these tasks.
But the nature of graph data poses challenges when it comes to *buzzword alert* scalability. So why is this, and are graph databases capable of scaling? Let’s see…
(more…)The ArangoDB Operator for Kubernetes – Stateful Cluster Deployments in 5min
At ArangoDB we’ve got many requests for running our database on Kubernetes. This makes complete sense since Kubernetes is a highly popular system for deploying, scaling and managing containerized applications.
Running any stateful application on Kubernetes is a bit more involved than running a stateless application, because of the storage requirements and potentially other requirements such as static network addresses. Running a database on Kubernetes combines all the challenges of running a stateful application, combined with a quest for optimal performance.
This article explains what is needed to run ArangoDB on Kubernetes and what we’re doing to make it a lot easier.
Interested in trying out ArangoDB? Fire up your database in just a few clicks with ArangoDB ArangoGraph: the Cloud Service for ArangoDB. Start your free 14-day trial here. Read more
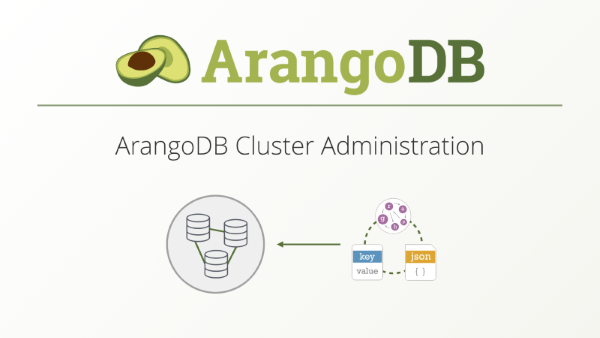
ArangoDB Cluster Administration Course Released
Cluster Administration course will take you all the way from concept and anatomy of the ArangoDB cluster to maintenance, resilience and troubleshooting of your distributed environment.
When data size or workload makes purchasing of a single database server prohibitive one needs to rethink the system architecture and consider to cluster a farm of more affordable machines. While ArangoDB clusters bring additional added value like seamless runtime scaling and thin provisioning, their management can look testy and challenging.
Interested in trying out ArangoDB? Fire up your cluster in just a few clicks with ArangoDB ArangoGraph: the Cloud Service for ArangoDB. Start your free 14-day trial here
We have tried to make the experience of bootstrapping, maintenance and operation of an ArangoDB cluster as easy as possible. With this course, we are addressing the general overview of administrative aspects of operating an ArangoDB cluster for database administrators and application engineers on an intermediate level.
The course shall touch upon inner workings and mechanisms involved in clustering of ArangoDB databases. It discusses basic administrative tasks like startup, orderly shutdown, rolling upgrading, creation and dropping of cluster database entities, authentication, SSL transport, live scaling of the cluster, and basic troubleshooting.
AWS Neptune: A New Vertex in the Graph World — But Where’s the Edge?
At AWS Re:Invent just a few days ago, Andy Jassy, the CEO of AWS, unveiled their newest database product offerings: AWS Neptune. It’s a fully managed, graph database which is capable of storing RDF and property graphs. It allows developers access to data via SPARQL or java-based TinkerPop Gremlin. As versatile and as good as this may sound, one has to wonder if another graph database will solve a key problem in modern application development and give Amazon an edge over its competition. Read More
Setting up Datacenter to Datacenter Replication in ArangoDB
Please note that this tutorial is valid for the ArangoDB 3.3 milestone 1 version of DC to DC replication!
Interested in trying out ArangoDB? Fire up your cluster in just a few clicks with ArangoDB ArangoGraph: the Cloud Service for ArangoDB. Start your free 14-day trial here
This milestone release contains data-center to data-center replication as an enterprise feature. This is a preview of the upcoming 3.3 release and is not considered production-ready.
In order to prepare for a major disaster, you can setup a backup data center that will take over operations if the primary data center goes down. For a server failure, the resilience features of ArangoDB can be used. Data center to data center is used to handle the failure of a complete data center.
Data is transported between data-centers using a message queue. The current implementation uses Apache Kafka as message queue. Apache Kafka is a commonly used open source message queue which is capable of handling multiple data-centers. However, the ArangoDB replication is not tied to Apache Kafka. We plan to support different message queues systems in the future.
The following contains a high-level description how to setup data-center to data-center replication. Detailed instructions for specific operating systems will follow shortly. Read more
ArangoDB: Consensus for Enhanced Data Stability
– law of the polish-lithuanian common-wealth, 1505
A warning aforehand: this is a rather longish post, but hang in there it might be saving you a lot of time one day.
Introduction
Consensus has its etymological roots in the latin verb consentire, which comes as no surprise to mean to consent, to agree. As old as the verb equally old is the concept in the brief history of computer science. It designates a crucial necessity of distributed appliances. More fundamentally, consensus wants to provide a fault-tolerant distributed animal brain to higher level appliances such as deployed cluster file systems, currency exchange systems, or specifically in our case distributed databases, etc. Read more
Starting an ArangoDB cluster the easy way
Recently, we have got a lot of feedback about the fact that standing up an ArangoDB cluster “manually” is an awkward and error-prone affair. We have been aware of this for some time, but always expected that most users running ArangoDB clusters would do so on Apache Mesos or DC/OS, where deployment is a breeze due to our ArangoDB framework.
However, for various valid reasons people do not want to use Apache Mesos and thus are back to square one with the problem of deploying an ArangoDB cluster without Apache Mesos. Read more
Deploy ArangoDB 3 Cluster: 2-Click Setup
Hurray! Last week finally saw the release of ArangoDB 3.0 with lots of new features and in particular various improvements for ArangoDB clusters. In this blog post, I want to talk about one aspect of this, which is deployment.
DC/OS
As of last Wednesday, deploying an ArangoDB 3.0 cluster on DC/OS has become even simpler, because the new version of our framework scheduler has been accepted to the DC/OS Universe. Therefore, deployment is literally only two clicks: Read more
Running ArangoDB 3.0.0 on DC/OS Cluster
As you surely recognized we´ve released ArangoDB 3.0 a few days ago. It comes with great cluster improvements like synchronous replication, automatic failover, easy up- and downscaling via the graphical user interface and with lots of other improvements. Furthermore, ArangoDB 3 is even better integrated with Apache Mesos and DC/OS. Read more