Dockerizing a Bloom-Based Nonces Service in 10 Minutes
In this article I want to explain how to setup a nonce-microservice using docker.
Nonce are one-time tokens that are used to ensure that an action can only be taken once. In a project, we needed to ensure that a pay button is only pressed once. Note that nonces are not used to sign requests or identify a user. This is a separate mechanism.
ArangoDB contains a nonce implementation which is a variation of Bloom-filters. It allows to store nearly unlimited nonces within a limited amount of memory. Nonce are allowed to age, that is after an hour they might expire. If there is sufficient interest, I will explain the algorithm implemented in a separate blog post.
The Crypto Functions
The functions provided by ArangoDB are createNonce and checkAndMarkNonce. The first creates a new nonce, while the latter will check and mark the nonce as used, it will return true if it was not yet used.
arangosh [_system]> var crypto = require("org/arangodb/crypto");
arangosh [_system]> crypto.createNonce()
VY0hJ2E118sktanp
arangosh [_system]> crypto.checkAndMarkNonce("VY0hJ2E118sktanp")
true
arangosh [_system]> crypto.checkAndMarkNonce("VY0hJ2E118sktanp")
false
In order to use these functions from our node.js application, I have created two endpoints using the Foxx framework available in ArangoDB.
POST /nonce
will create a new nonce and return it in the form of a JSON object with a single string attribute nonce.
PUT /nonce/THE_NONCE_STRING
checks the nonce and marks it as used, it will return true or false. The Foxx application is straightforward and consists of a small controller file, which wraps the two crypto functions.
controller.post('/', function (req, res) {
  res.json({ nonce: crypto.createNonce() });
});
and
controller.put('/:id', function (req, res) {
  res.json(crypto.checkAndMarkNonce(req.urlParameters.id));
})
.pathParam('id', nonceIdSchema)
.errorResponse(ArangoError, 404, 'The nonce could not be found');
The complete source code can be found on github.
Testing it locally
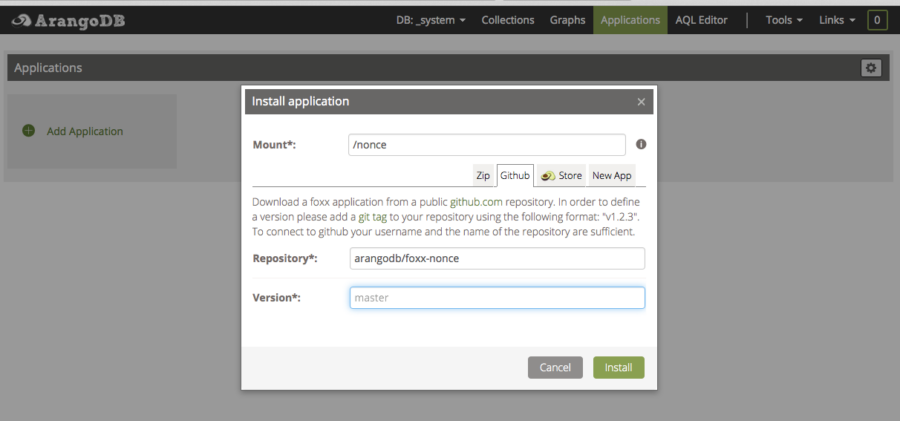
First of all, let’s test our shiny new application locally. Startup an ArangoDB and use the frontend to install the nonce service from github
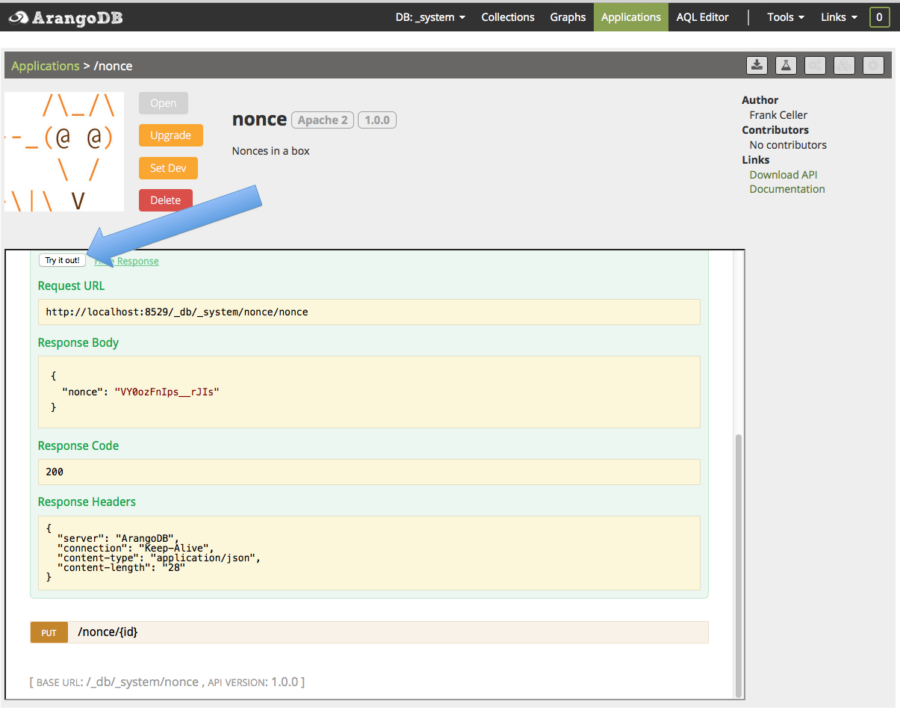
We can now tests the service using the interactive documentation. Using the “POST” route, we create a new nonce.
The first time we validate it, the validation succeeds.
After that, the token is used
Create a Docker Container
For easy deployment, I’m going to create a docker container. A Dockerfile for a vanilla installation of ArangoDB is available at
https://github.com/arangodb/arangodb-docker
I’ll go for version 2.6
shell> git clone -b 2.6 https://github.com/arangodb/arangodb-docker.git
shell> cd arangodb-docker
The standard Dockerfile comes without any installed foxxes. It is, however, easily possible to create mounted foxxes during initialization. Create a file foxxes/mounts.json with your mount points.
shell> cat foxxes/mounts.json
[
  { "app": "nonce.zip", "mount": "/service" }
]
You also need to copy the Foxx zip of the nonce application into the directory foxxes. The zip can either be downloaded from the local installation via the download button or created from the repository on GITHUB.
shell> wget https://github.com/arangodb/foxx-nonce/archive/master.zip
shell> mv master.zip foxxes/nonce.zip
The access to ArangoDB is password protected by default. However, we want to access the service without a password.
shell> cat local-config/arangod.conf.local
[server]
authenticate-system-only = true
This will waive the password restriction for any installed foxx, while keeping the administration interface and the standard API protected.
That’s it. Create a Docker container and be happy.
shell> docker build --tag=nonce .
shell> docker run -p 8529:8529 nonce
You can now test the service using CURL
shell> curl -s -L -X POST --data '' "http://192.168.59.103:8529/service/nonce" | json_pp
{
   "nonce" : "VY0509IwliaiD--T"
}
shell> curl -s -L -X PUT --data '' "http://192.168.59.103:8529/service/nonce/VY0509IwliaiD--T" | json_pp
true
shell> curl -s -L -X PUT --data '' "http://192.168.59.103:8529/service/nonce/VY0509IwliaiD--T" | json_pp
false
Final remarks
This was easy, wasn’t it?
Please note that we have already prepared foxx apps in our ArangoDB store that deal with oauth2 authentication, session service (for a complete worked example see sessions-example) and the like. The installation and deployment work equally simple and completely analogously to the above.
Microservices are the future. With this technology it can arrive even faster than anticipated anyway.
Get the latest tutorials, blog posts and news:


